5.1 Temp Mixing on Star Trek Into Darkness
On Star Trek Into Darkness, we wanted to try something new for our sound workflow, and that was to keep a running 5.1 mix in the editors' reels throughout the entire editorial process. During Post on Super 8, J.J. Abrams had mentioned to his Post Supervisor, Ben Rosenblatt, that he wished he could have better sound while editing, and a "temp dub as you go." He wanted to be able to screen the rough cut with no notice, allowing him to edit right up until it was time to show it, instead of having to lock a version of the cut a week in advance in order to do a temp sound edit and mix in ProTools.
When Media Composer v6 came out and we saw that we could do a surround sound mix inside MC for the first time, Ben decided to go ahead with this experiment. We started digging in to exactly how MC handles 5.1 sequences, what pitfalls there might be between systems that had a 5.1 speaker setup and ones that had only stereo, and after that was all figured out we started building a 5.1 edit suite at Bad Robot. We mounted a projector, installed speakers, rigged up a screen, tuned the room to match the theater upstairs, bought two Artist Mix consoles and an Argosy console to hold everything, and started making the most complex temp soundtrack ever contained within 16 mono tracks.
Getting Started
Our first task was to figure out how Avid had designed their new 5.1 functionality, and what effects that might have on the editors. We wanted this process to be as seamless as possible for them, so if something about having a 5.1 sequence got in the way of their ability to cut, that would be a problem. Thankfully, we found that a 5.1 sequence will automatically and gracefully fold down on stereo-equipped systems, and you might not even notice that the sequence is set for 5.1. The biggest change we had to make across the entire Editorial team was that everyone had to work in stereo or 5.1. Many editors still like to work in Direct Out, but unfortunately if you are planning to mix in 5.1, Direct Out is not an option. All panning is done with clip settings and keyframes, and you need every available inch of space on the timeline, not to mention many other reasons why Direct Out is not ideal.
Once that change was made and we'd double-checked that everyone's mixers were set properly, we started receiving reels from the editors as they finished a first pass with J.J. They were working chronologically, so we did as well, and the first sequence we designed and mixed was the prologue on the Red Planet.
Crew
We had four main people on the sound design team, with three of us working entirely in Media Composer, and our responsibilities divided up similar to a real sound department.
- Matt Evans went to town cleaning up and normalizing all of our production dialogue
- Robby Stambler provided us with an awesome sound effects library, and specialized in cutting foley.
- I handled fx editing as well as the overall mix
- Will Files came down from Skywalker Sound to supervise the whole process, and hooked up a ProTools system to our ISIS in order to make custom Star Trek effects like ships, phasers, and transporters.
Track Layout
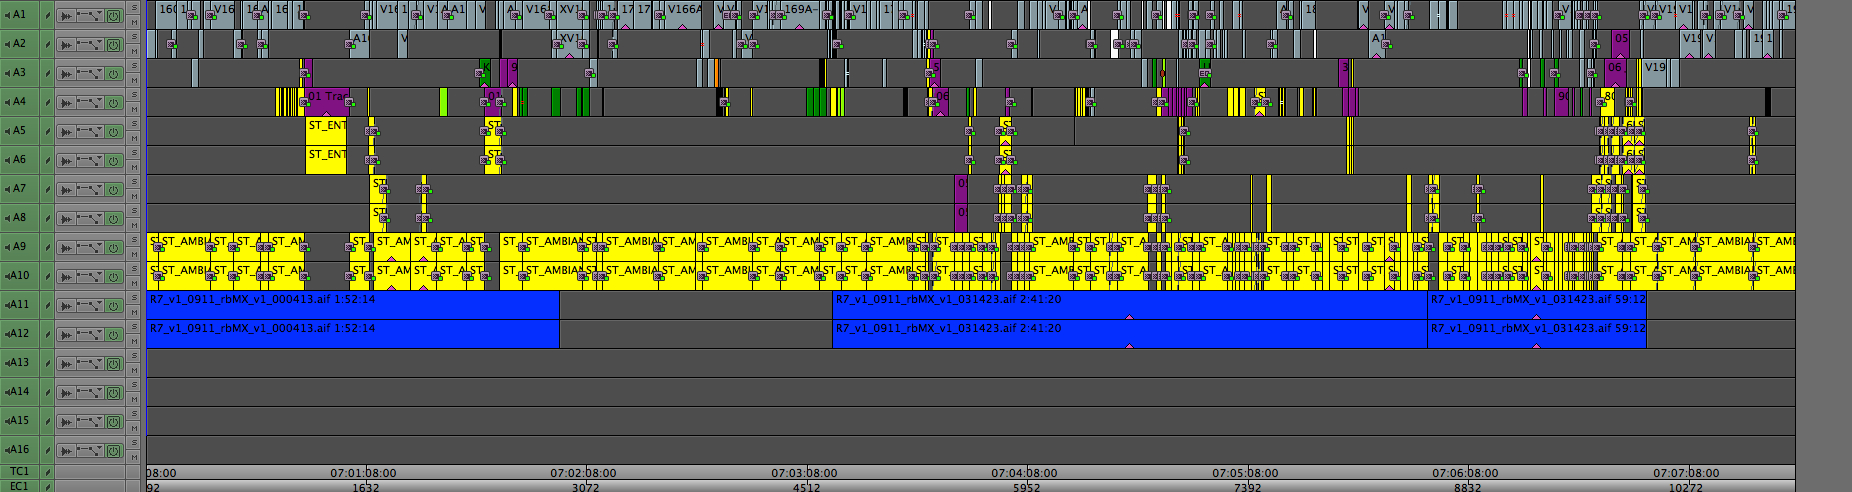
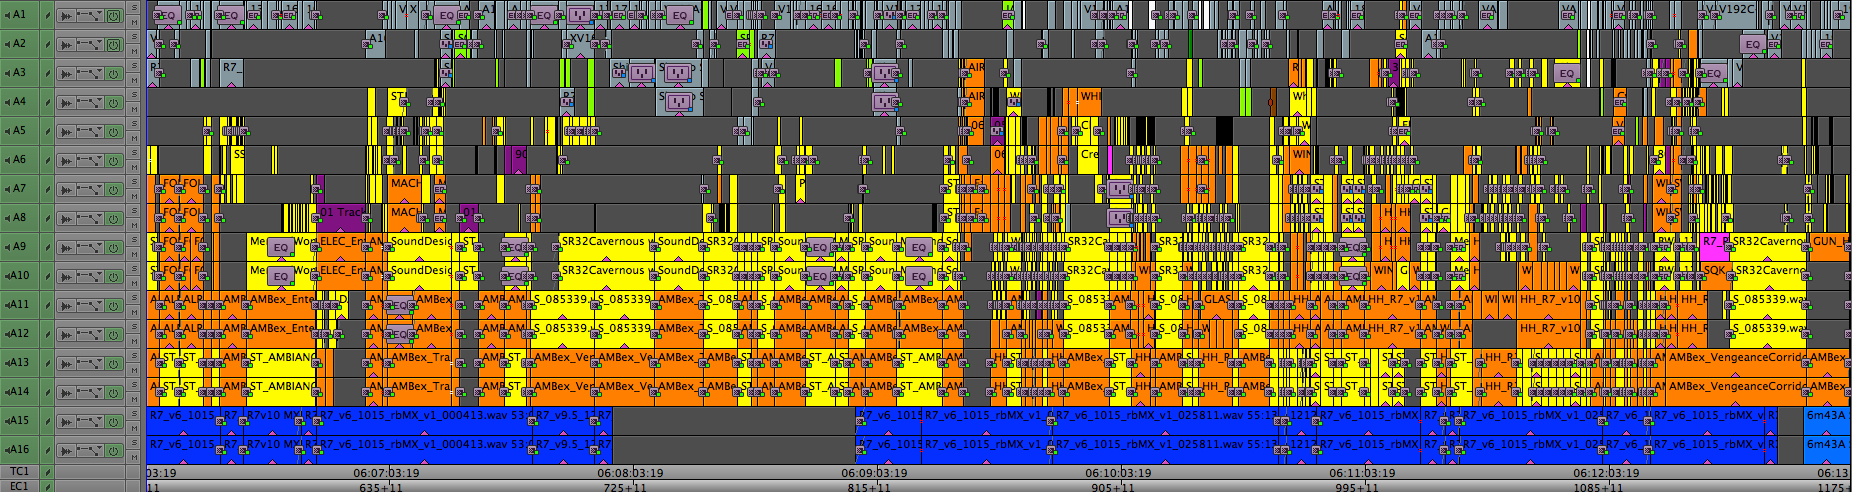
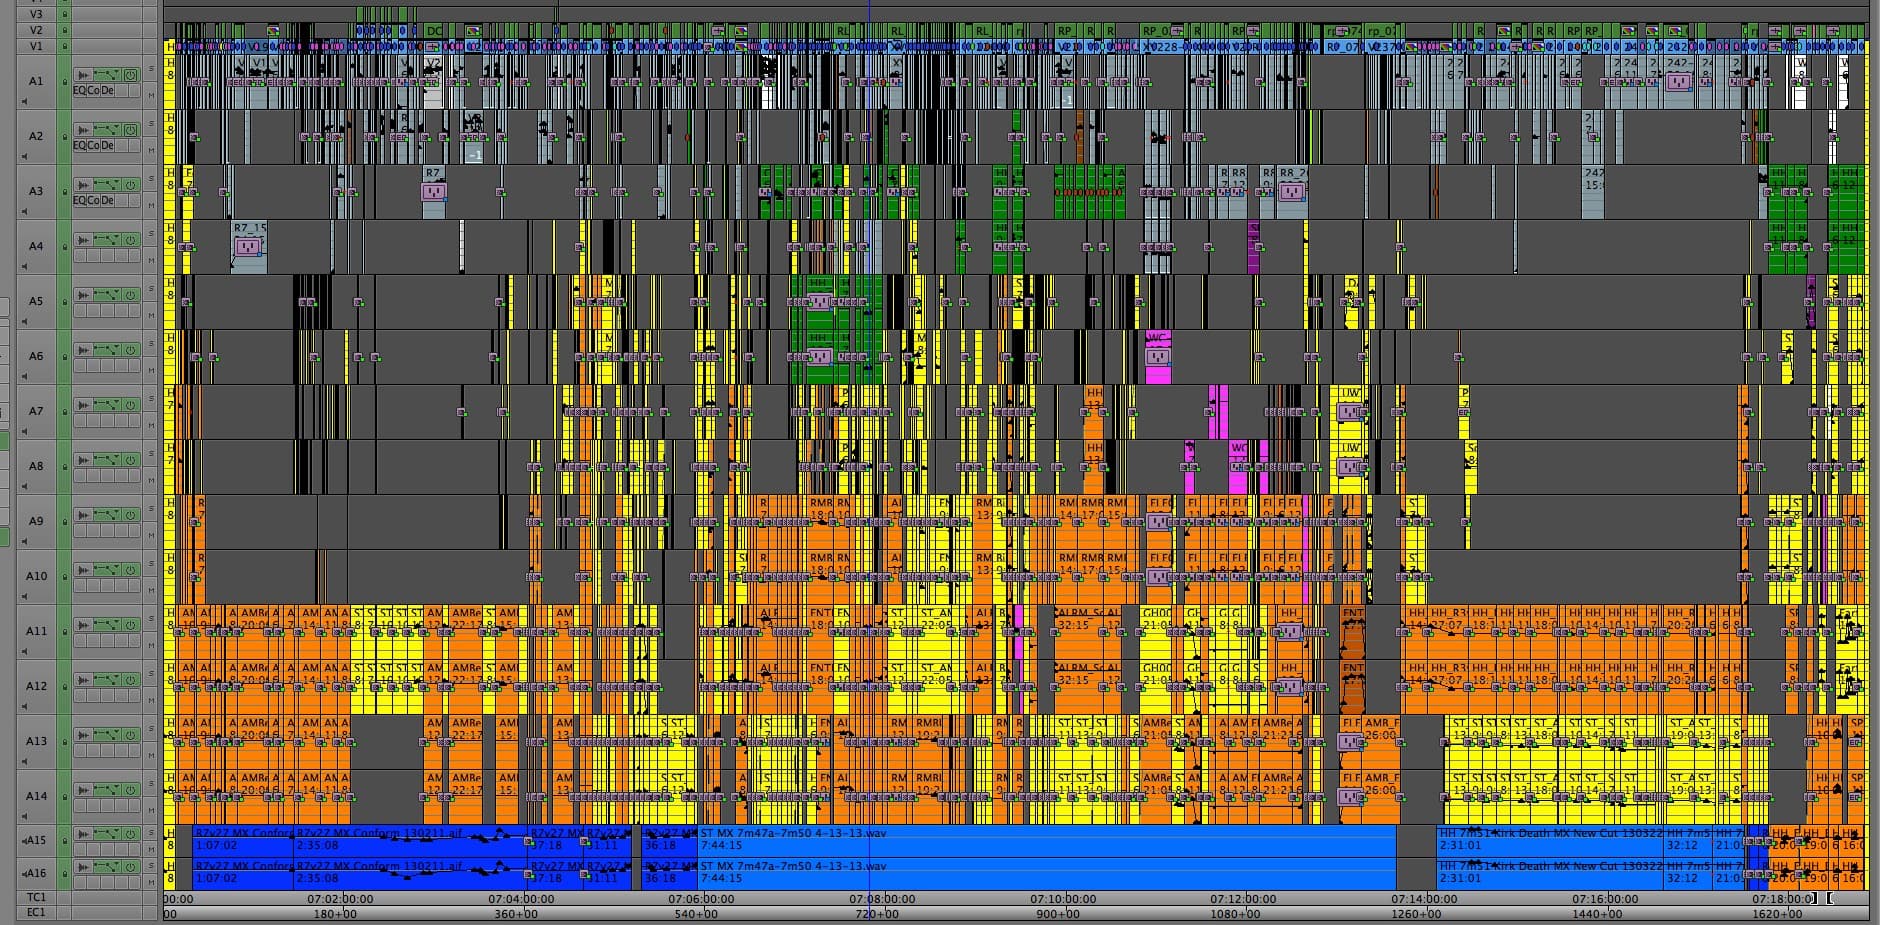
When Avid released Media Composer 6.5, there were a host of new audio controls that didn't exist previously. We wanted to take advantage of them, but we didn't want to upgrade the whole show all at once on the day the new version came out. This left us with a mix of versions, which is also not desirable, and meant that we had to be conscious of their differences, such as the maximum number of simultaneously playable tracks. In order to keep the editors' sequences as easy to cut with as possible, and since they wouldn't be able to play more than 16 tracks at one time anyway, we worked within the confines of 16 mono tracks for the whole movie.
The next time we do this, I think we'd stick to 16 tracks so that the sequences aren't any more of a hassle to cut with, but we will likely use a different track layout that would be established from the start. It would be something like:
- 4 mono tracks for dialogue
- 5 mono tracks for SFX
- 4 stereo tracks for SFX
- 2 stereo tracks for music
- 1 5.1 track for pre-cut SFX from ProTools
Eventually we did have to upgrade almost everyone to 6.5.2, when we started constantly running into the maximum number of clip references that a bin could contain. Our timelines were too full to fit into the old bin constraints, though that max level had been set a long time ago and I just think it was forgotten about and never updated. When we brought it to Avid's attention, they sent us a patch to hold us over, and then released the new bin reference limit as a feature of 6.5.2.
How It Works
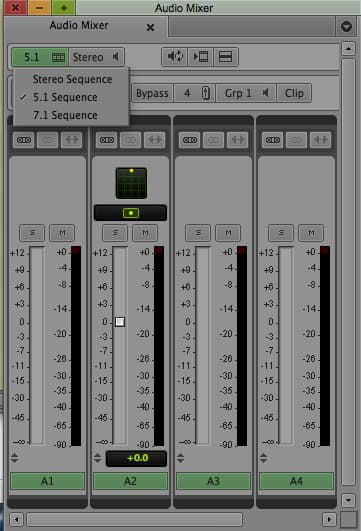
5.1 panning in Media Composer is done on a clip-by-clip basis. Which track a clip is cut in on doesn't matter as long as your audio output is set to 5.1, 7.1, Stereo or Mono. Direct Out is the only setting to avoid for a surround sound sequence. To set a sequence to 5.1, look for the sequence setting in the upper left hand corner of the Mix Tool.
Once you put a sequence into 5.1, you can just leave it there even if you then move to a stereo system. All the surround sound panning is retained even if someone switches the sequence setting back to stereo or cuts the clips into a new sequence.
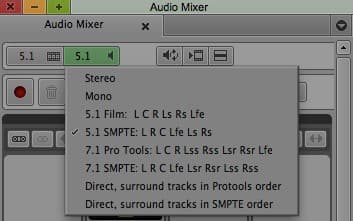
The right setting controls the audio output from your system. We used the SMPTE channel order for everything, so my system was always set to 5.1 SMPTE (L R C LFE Ls Rs).
How to Pan
A clip can be panned to a specific channel or to a mix of channels, with the exception of the subwoofer. Each clip has an LFE level you can set in the big panner window that determines how much of the low end of the clip is sent to the LFE channel, but you can't send a clip exclusively to LFE.
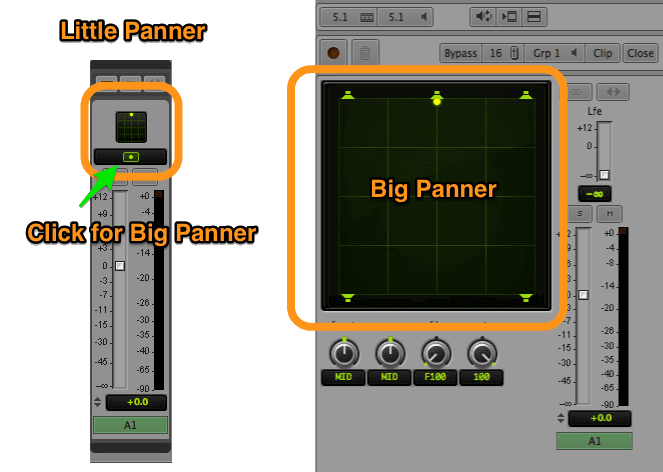
There are several ways to pan a clip, and which one I use often depends on what I need to do. The first and fastest way is to use the small 5.1 panner above each channel in the mix tool. You can drag the little yellow dot anywhere in the grid and that will set the clip pan.
The second way is to open the big panner, by clicking the yellow eye-looking icon on any of the channels. This allows for more precise panning than you can get from the mini panner.
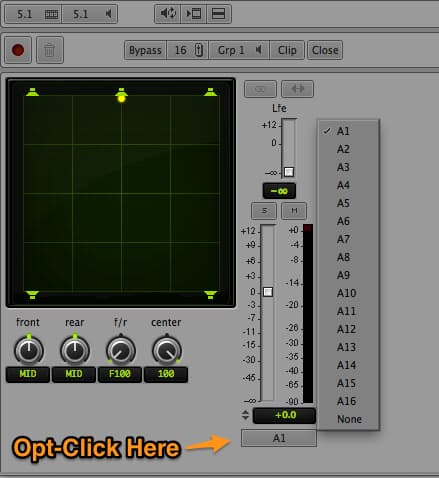
If you want to keyframe your pan, you have two options. You can enable keyframing for any one of these directions: Front Left-Right, Rear Left-Right, Front-Rear, Center % (if you want a center panned clip to also be sent to L & R). If you're doing a complex pan, you will often need to add keyframes in the first three settings. Unfortunately there is no way to display all the settings at once, so this method involves a lot of clicking between settings to get a pan right.
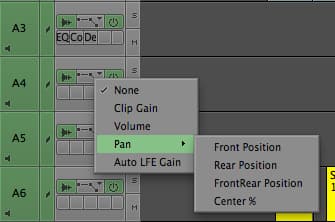
MC lets you keyframe four properties: Front left-right, Rear left-right, Front-Rear, and Center % (if you want a center panned clip to also bleed into L & R)
The second way to animate a pan is to change your Mix Tool mode to Auto, and use either the mini or big panner to set your keyframes. You can do this live by recording automation, or you can position your playhead where you want your first keyframe, drag the yellow dot to where you want to start your pan, then move the playhead to where you want the next keyframe and drag the yellow dot to where you want the panning move to end. As soon as you move the yellow dot, a set of keyframes are made at that location in the clip representing that pan setting.
When using this method, it is often necessary to set the yellow dot to the exact opposite end of the grid from where you want it, and then set it back to desired pan location. This ensures that a keyframe is made in all three axes. Otherwise, MC might not set a keyframe that you actually need and your panning move won't go exactly where you intended it.
For example, if you have a three point animation, from Front Left to Front Right to Rear Right, MC won't make the Front-Rear keyframe if you're only dragging the yellow dot across the top of the grid because it hasn't perceived a change in the default Front-Rear value that would warrant making a keyframe. This means that you would end up with no Front keyframe at all and a move that goes Rear Left to Rear Right without stopping at Front Right first. The video below explains this better:
Splitting Up the Work
Dialogue Cleanup and Normalization
As you may have seen in my article on quick dialogue cleanup, using RTAS effects was a core component to getting our dialogue in the right space. That was far from the only modification we did to the dialogue, though. We bought iZotope RX2, which is commonly used in ProTools to clean up noisy tracks, as well as Speakerphone 2, which handled all of the different futzes that are needed for a movie where people are constantly talking on all sorts of different communication devices. Both of these are common ProTools plugins, and it turns out that they work almost as well in MC. iZotope in particular requires a bit of handholding in MC, but once you know its problems you can take care to avoid them.
MC's built-in 3-band EQ is also very handy for reducing boominess, increasing clarity, and quickly taking out a problem frequency. Moreover, Matt would often use keyframing to bump or dip individual syllables in order to make sure that the dialogue was as easy as possible to understand.

AudioSuite Effects and Bin Size
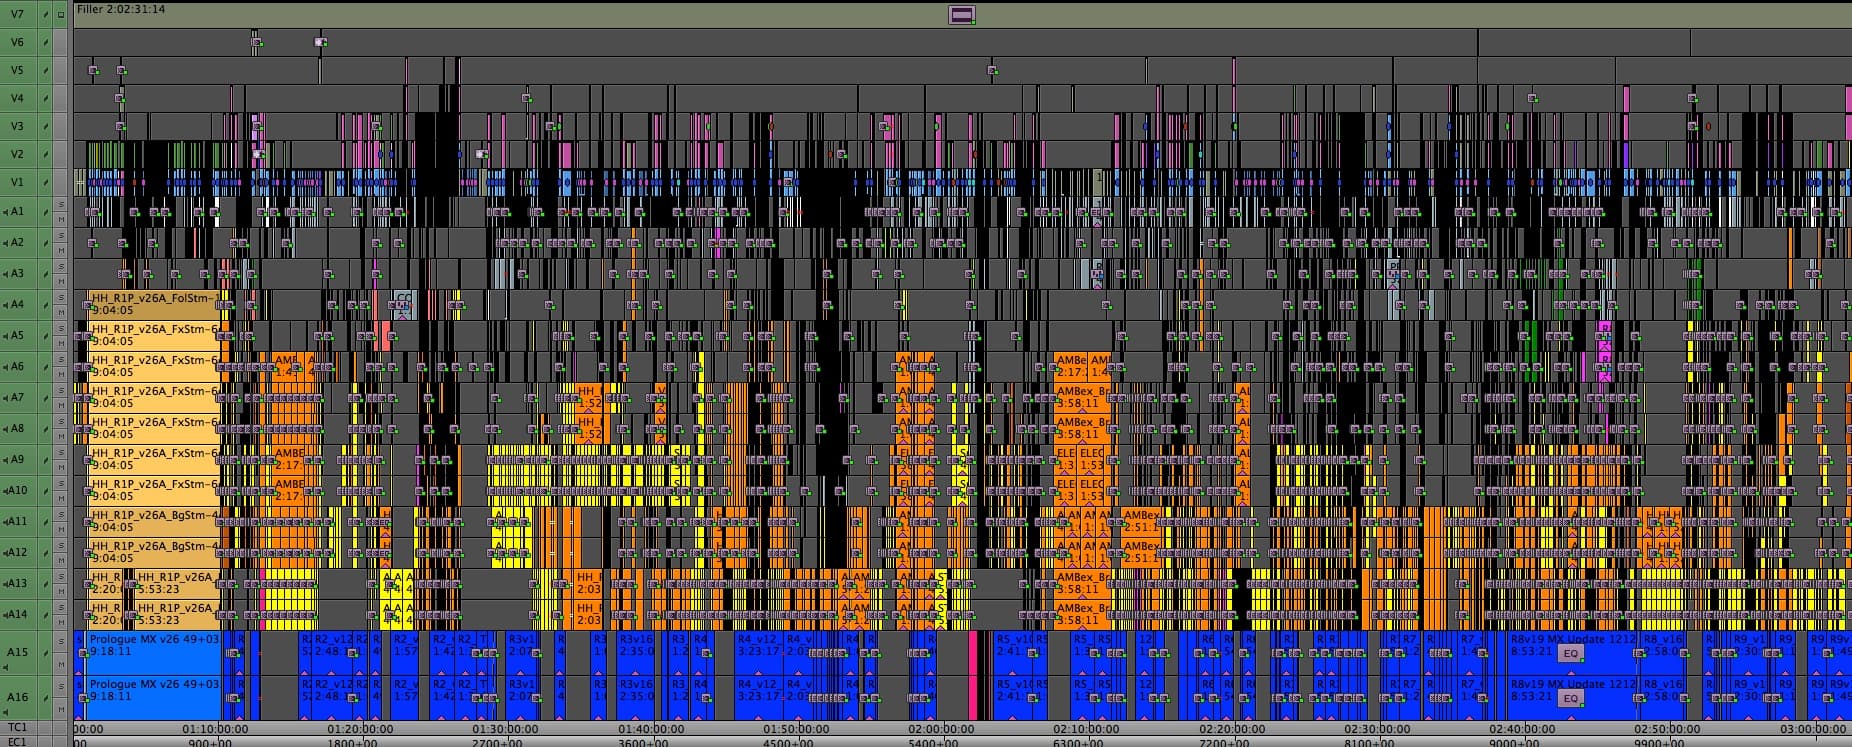
One side effect of all the dialogue cleanup and futzing we had to do turned out to be a massive increase in the size of our bins. While a sequence bare of AudioSuite effects and EQs might have been 15 MB, a sequence with all those effects easily reached 100-200 MB in size. If there were multiple versions of a reel inside the bin, the file size of the bin would multiply accordingly. A bin with a full copy of the movie in it, such as the one I used to take the screenshot at the bottom of this post, could come in over 1GB easily. Because of this, and because these sequences get duplicated frequently into other bins for turnovers and outputs, the total size of the Star Trek project directory was over 100GB, and that's with some culling of old bins into another archive folder.
Sound Effects Editing
I handled most of the sound effects editing, though I was often given a head start by the 1st Assistant Editors, Julian Smirke and Rita DaSilva, who did first passes on ambiences and key sound effects for the editors during the assembly. Matt, Will, Robby and I would create a master list of effects goals we wanted to accomplish for our first pass, including what existing effects were working well and what we could improve. I would then go through and start removing one channel of most of the stereo effects that were already in the timeline, and then re-pan them so they still sounded right. This included flybys, where I would usually keyframe a pan in one channel instead of keeping two channels on the timeline. Effects that needed to be in stereo, such as ambiences, would of course get to keep both channels.
After I had removed as many redundant channels as possible and stripped out effects that we would replace, I dug into Robby's library and started filling the timeline back up with new fx. I like to do a rough mix and pan as I go, even though a more thorough mix pass still needed to be done after taking delivery of Matt's cleaned up dialogue tracks, whatever fx Will was making, and our temp score from Ramiro Belgardt and Alex Levy. Robby also tackled a lot of foley, since once you start down the road of making your temp sound good, you start to notice that you can no longer skip the things you would normally ignore for a temp, such as foley.
Over on ProTools, Will was busy doing things that were better suited to be done in a real audio editing application. I would hand him a Quicktime and linked AAF of the reel after I had cleaned it up, and with his ProTools rig on our ISIS, he was immediately able to get to work. He designed and edited many versions of the lasers and jump ship engines for the conference room attack, the sound of the Vengeance engines, a lot of new ambiences, phasers, transporters, and anything else that he wanted to tackle. When he had some effects to bring back into Media Composer, he'd put an embedded AAF on a shared ISIS folder, and I'd import it and cut it onto new tracks at the bottom of our timeline, where it would already be cut to time. I would just need to apply the proper panning and gain, and then try to find some open space on the timeline so I could keep the sequence within 16 tracks. Playing Tetris as a kid came in very handy here!
A lot of the effects and design choices that the four of us made during this process ended up in the final mix, which is a testament to the work we did as well as the iterations we were able to go through so that by the time we got to the final mix, we knew what J.J. wanted to hear.
Music
Our music editors, Ramiro and Alex, delivered to me stereo bounces of the temp score they had cut in ProTools, and after I cut them in we would mix them together. We set almost all of our music at a default pan of 75% front on both sides, so that there would be just a little of the music in the surrounds at all times. Originally, this was the area where I most used the automation recording feature of MC in combination with the faders on the Audio Mix console. It worked alright, but after a while I found it was still faster and cleaner to use manually placed keyframes.

A Note on Automation
When you record automation, you then have to go back and filter half of the keyframes out, but even after that you still can't get the moves as clean as you'd like them. If you want to go manually touch up a section, you end up having to grab dozens of keyframes, and if you're zoomed out you might not be able to see all the keyframes you need to grab. This can leave you with a sudden bump in volume if you grab a range of keyframes but miss the last one. Because of all this, I gave up on recording automation for our music mix, and our Artist Mix consoles became useful only for their dedicated Solo/Mute buttons. If Avid made a console that was only Solo/Mute buttons, I would buy it.
Mix
With all of the dialogue, effects, and music now in the timeline, I would then go through the sequence again to make the final mix. I made sure the RTAS effects were in place (they can get dropped if you make a new sequence instead of duplicating an existing one), and went through to make sure that no effects or music were drowning out the dialogue, and that the effects and music weren't competing against each other. Will would often sit in and provide direction while I was mixing, and once we were satisfied for the moment the four of us would reserve time in the Bad Robot theater to go preview it there. After doing another pass through the reel after our preview screening, we would then show it to the editor whose reel we were cutting and get notes from her.
Showtime
The first full screening was in mid-October, and it was a big deal because it was the first time anyone including J.J. had watched the movie all the way through. He gave notes on everything: story points, music, vfx, sound, you name it, and all of it needed to be fixed before a studio screening that was fast approaching. We fared pretty well, and I think that is due in part to the fact that although he had not heard more than bits and pieces of our 5.1 mix by that point, he had been hearing it in stereo while cutting with the editors. So by the time he got up to the theater, most of the audio content wasn't a surprise for him, and he was able to think about other areas to fix while watching his first surround sound Director's Cut.
Almost a Taft-Hartley
The voice of yours truly was placed in the temp track a couple of times. Replacing one of my two lines was one of J.J.'s first audio notes, and by the time the film was locked the second line was gone, too. But don't fret, if you want to hear me in action, check out Hellboy 2, where I voice the BPRD PA system!
Keeping Up With Changes
Our first pass through the whole movie took about four months. Some of that time was dependent on when the editors were ready to hand their reels off to us, but even still there was not a lot of extra time. Most reels took us a week or two to prepare, though the first few reels took longer than the later ones, and the big ship crashing sequence towards the end of the movie was initially designed and mixed over the course of a few days because that's all we had.
After the first full screening, we had the dual tasks of continually improving the soundtracks while also keeping up with changes. When the first few studio screenings came up, we brought all hands on deck again to smooth out the soundtrack where the editors had made cuts, and add new sounds to match new visual effects that had come in from ILM. Later on in Post, we were able to reduce the workload of prepping for a screening to one person in the 5.1 edit suite just patching things up over one or two very long days. Since the design work was basically done by then, checking the mix involved just watching through the reels listening for pops, missing or out of sync fx, new dialogue lines that needed an EQ or noise reduction, and sometimes mixing in a new music cue.
Handing off for the Final Mix
Keeping the soundtrack up to date inevitably fell by the wayside the more that Skywalker Sound's crew took over. Will moved into the 5.1 edit room that had been my office, configured it for ProTools, and started doing predubs. A couple other Skywalker crew members came down, set up their own ISIS, and worked out of Bad Robot until everyone moved to Fox for the final mix. At this point I was actually off the movie, having finished what I was hired to do and left for another job. When at last I heard the final mix, I was amazed at how much of our work was still in there. A lot of it had been combined with other effects to make something new, but even in places where our effects had been entirely replaced, the replacements often reflected our initial design choices.
Those of us on the Editorial side, namely everyone except Will, always had low expectations for how much of our work would survive. After all, as picture assistants we're used to nothing from our temp track making it into the final mix, and usually that's as it should be. On this movie, I'm beyond thrilled that we were able to contribute so much, and I'd like to think that the work we did provided Skywalker a useful head start.
On a Personal Note
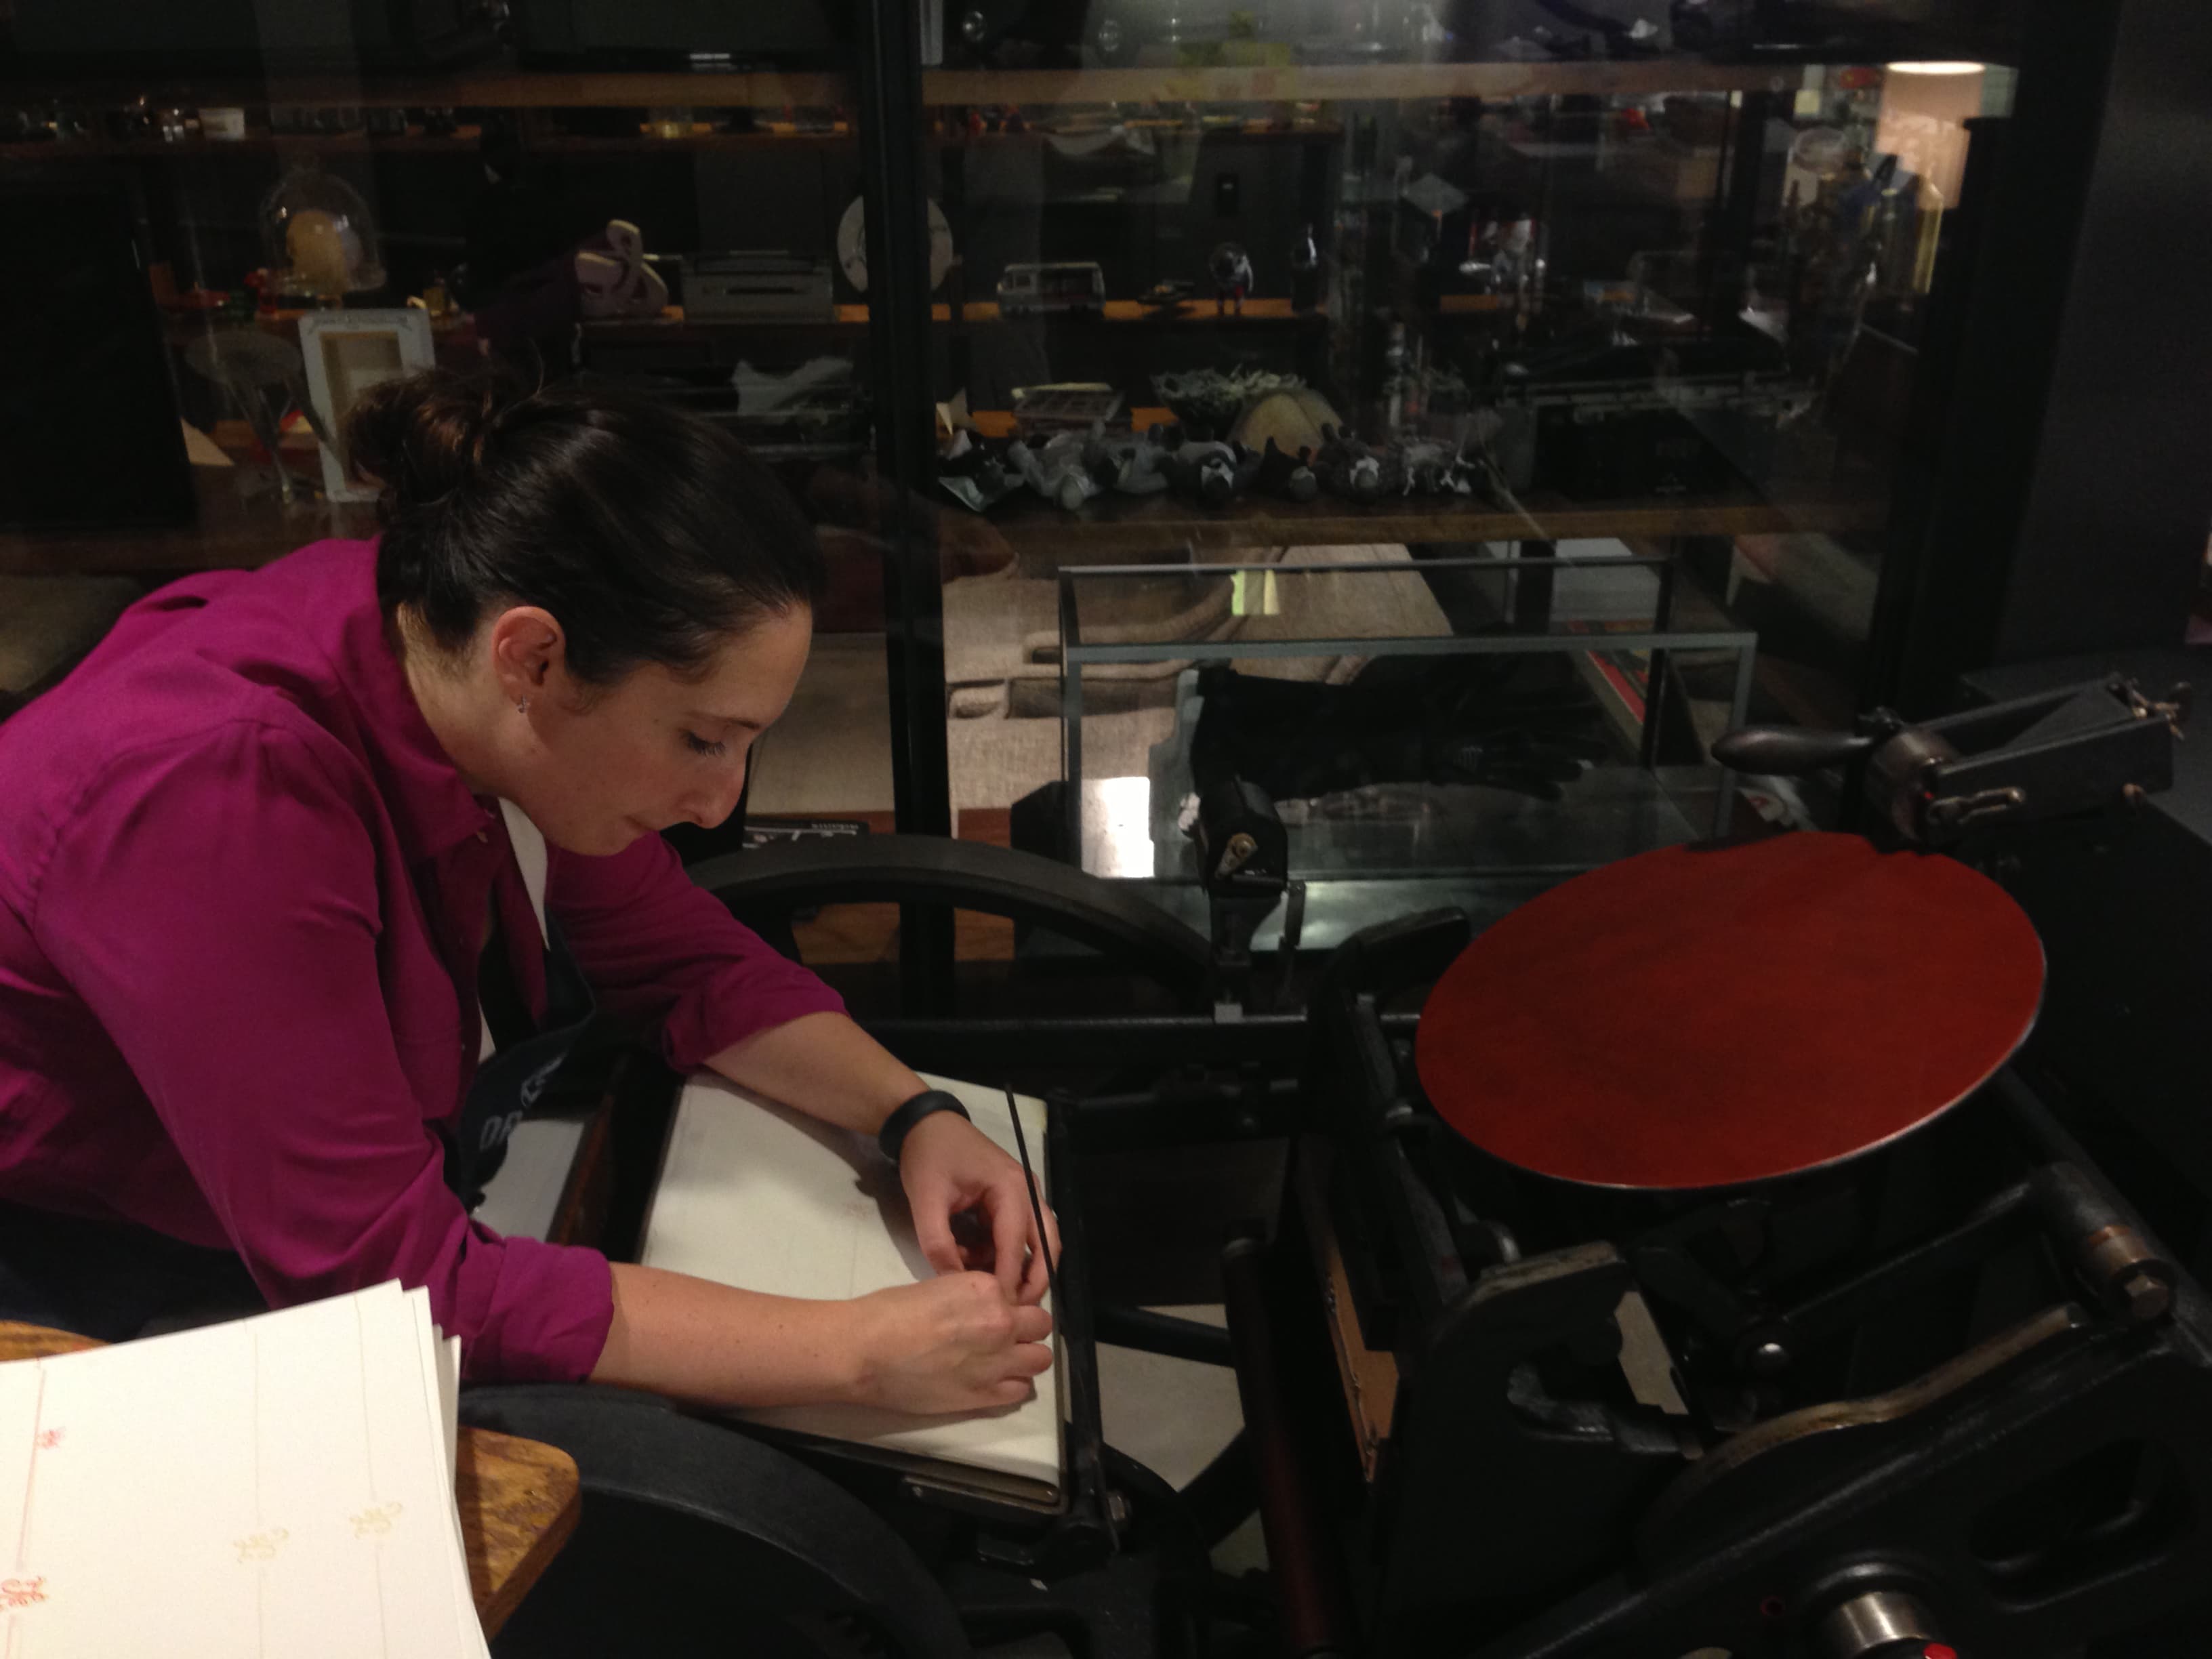
Every film is an all-consuming commitment to the project. You have very little free time, and go months without seeing friends, family, or even the person you're living with. Nevertheless, life can't stop completely, and on this film I was balancing my job on Star Trek with the job of planning for my wedding. I proposed in July 2012, on the day before I started work on the movie, and I got married a week after we broke for Christmas hiatus. Many sleepless nights inbetween were spent at Bad Robot going back and forth from mixing a reel to printing invitations, addressing envelopes, and editing my wedding slideshow video. I am very thankful for my wife's understanding and patience with my crazy schedule throughout those six months.
Mid-way through Reel 2, Noel Clarke's character drops a ring into a glass of water, causing a massive explosion. In the final mix, the sound of that ring is a processed version of my wedding ring dropped into a glass of water. It's a pivotal moment in the film, and its sound is a reminder of both my work on this film and that I got married during it. I can't think of a better way to remember this time in my life than that.